
Once you have finished configuring Keycloak, you’re ready to add roles, optional groups, users, and service accounts into it to be used for authentication to Keyfactor Command.
 Roles and Groups
To add roles and groups in Keycloak:
-
Use a browser to open the Keycloak management interface. For example:
https://appsrvr18.keyexample.com:1443Click the Administration Console link and sign in with an administrative user and password (see Installing Using Docker Compose).
-
In the Keycloak Administration Console, select the Keyfactor realm.
-
In the Keycloak Administration Console, browse to Realm roles. Click Create role to add a new role to be used to grant permissions in Keyfactor Command. Enter a Role name and Description.
Note: The Role name is used when referencing the role from Keyfactor Command to create a claim and map it to a security role to grant permissions to users.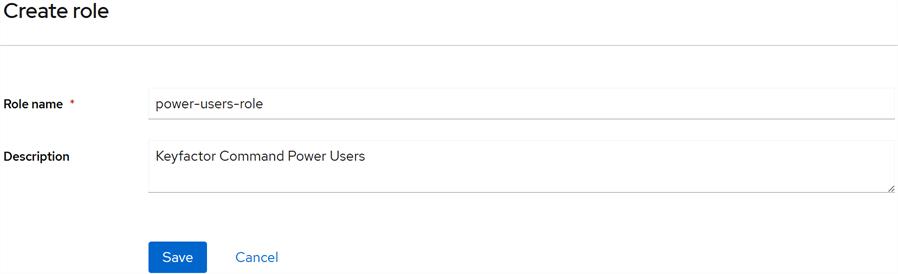
Figure 517: Add a Keycloak Role
Repeat this step for each role that you will use from Keyfactor Command. For example, administrators, power users, and limited access users.
-
If desired, you can organize your roles into groups. This can simplify the process of assigning the roles to your users. To create a group, in the Keycloak Administration Console, browse to Groups. Click Create group to add a new organizational group. Enter a Name for the group.
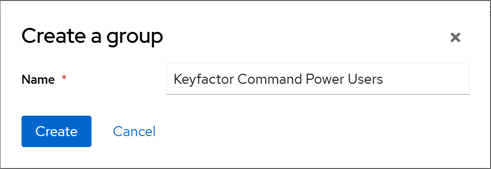
Figure 518: Add a Keycloak Group
-
Once the group creation is complete, open the group details. In the group details on the Role mapping tab, click Assign role and select the role or roles to assign to this group.
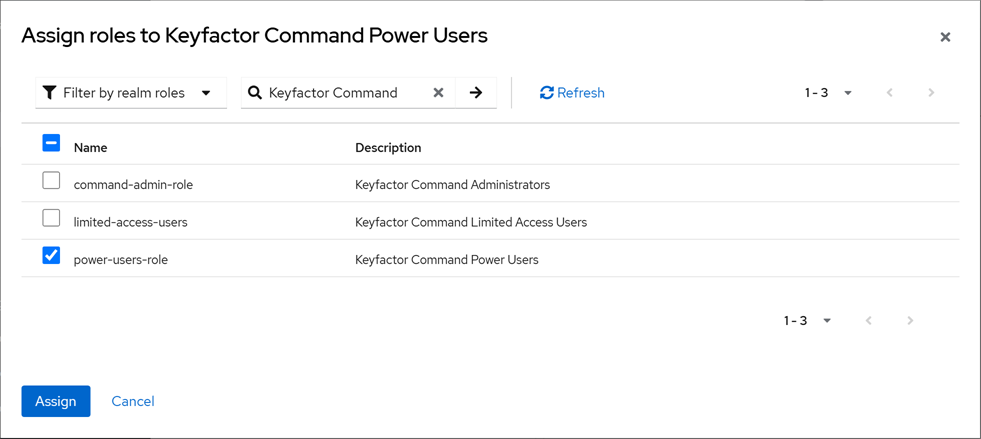
Figure 519: Assign a Role to a Group in Keycloak
Repeat these two steps for each group that you will use to manage roles in Keycloak.
Users
Be sure to create your roles and groups before adding your users.
To add users in Keycloak:
-
Use a browser to open the Keycloak management interface. For example:
https://appsrvr18.keyexample.com:1443Click the Administration Console link and sign in with an administrative user and password (see Installing Using Docker Compose).
-
In the Keycloak Administration Console, select Keyfactor in the realm dropdown.
-
In the Keycloak Administration Console, browse to Users. Click Add user to add a user. Enter at minimum a Username, and click Join Groups. In the Select groups to join dialog, select an appropriate group for this user and click Join.
Tip: By joining a group, your user now inherits the roles of this group.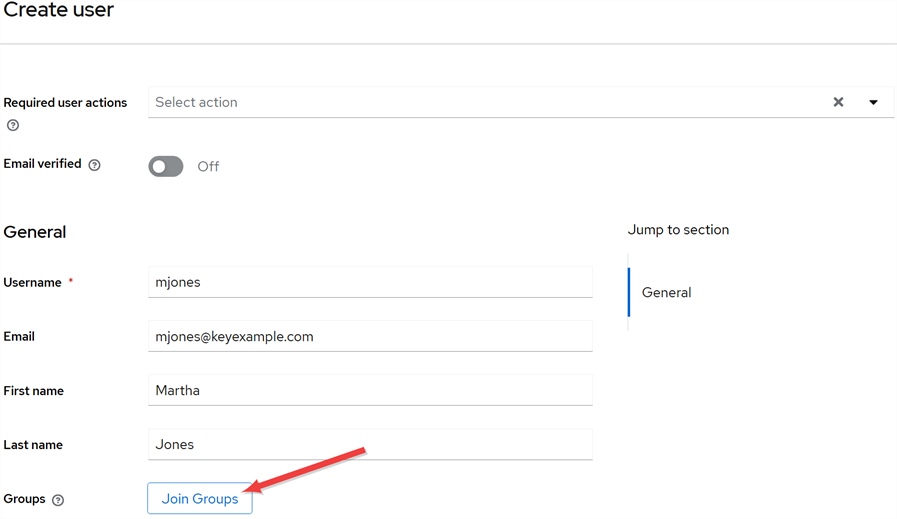

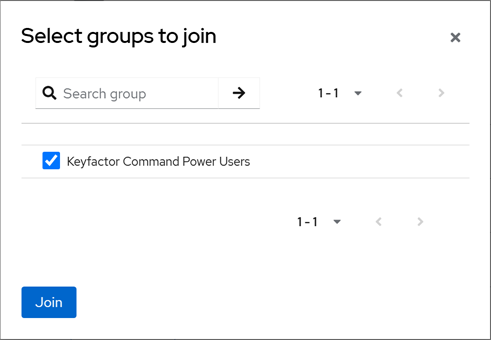
Figure 520: Add a Keycloak User and Join a Group
-
Once the user creation is complete, open the user details. In the user details on the Credentials tab, click Set password and set a temporary password for the new user. The user will be prompted to set a new password on initial logon unless you toggle the Temporary option to Off.
Important: Keyfactor highly recommends that you use strong passwords for any accounts or certificates related to Keyfactor Command and associated products, especially when these have elevated or administrative access. A strong password has at least 12 characters (more is better) and multiple character classes (lowercase letters, uppercase letters, numeral, and symbols). Ideally, each password would be randomly generated. Avoid password re-use.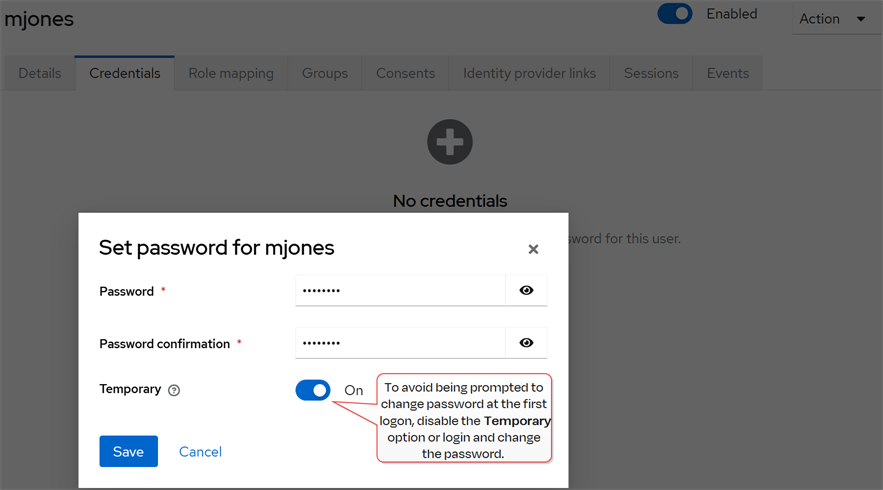
Figure 521: Set a Password for the Keycloak User
Repeat these steps for each user who will access Keyfactor Command using an identity provider other than Active Directory.
-
If you prefer to add roles directly rather than via groups, in the user details on the Role mapping tab, click Assign role and select a role for the new user.
Tip: Roles assigned via group membership won’t appear on the Role mapping tab unless you uncheck the Hide inherited roles checkbox.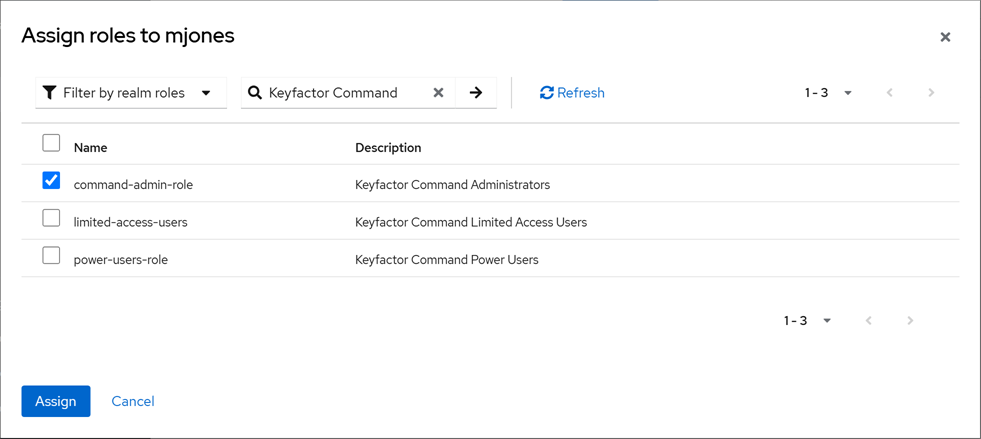
Figure 522: Assign a Role to a Keycloak User
Service Accounts
Keyfactor Command uses client records in Keycloak to provide some service account functions. You will or may need this type of service account if you plan to:
-
Install Keyfactor Command (a service account is added to allow Keyfactor Command to make API
An API is a set of functions to allow creation of applications. Keyfactor offers the Keyfactor API, which allows third-party software to integrate with the advanced certificate enrollment and management features of Keyfactor Command. requests to Keycloak) -
Use the Keyfactor API
To add clients for service account in Keycloak:
-
Use a browser to open the Keycloak management interface. For example:
https://appsrvr18.keyexample.com:1443Click the Administration Console link and sign in with an administrative user and password (see Installing Using Docker Compose).
-
In the Keycloak Administration Console, select the Keyfactor realm.
-
In the Keycloak Administration Console, browse to Clients. Click Create client to add a service account.
-
General Settings: Select a Client type of OpenIdConnect and enter a unique Client ID. This Client ID will be how you will reference the service account from Keyfactor Command. It should not contain spaces. Give the client a Name and Description. Toggle the Always display in UI option to On to allow the account to always appear in the UI even when it’s not in active use. Click Next.
-
Capability Config: Enable Client authentication and uncheck everything except Service accounts roles.
-
Login Settings: Accept the defaults.
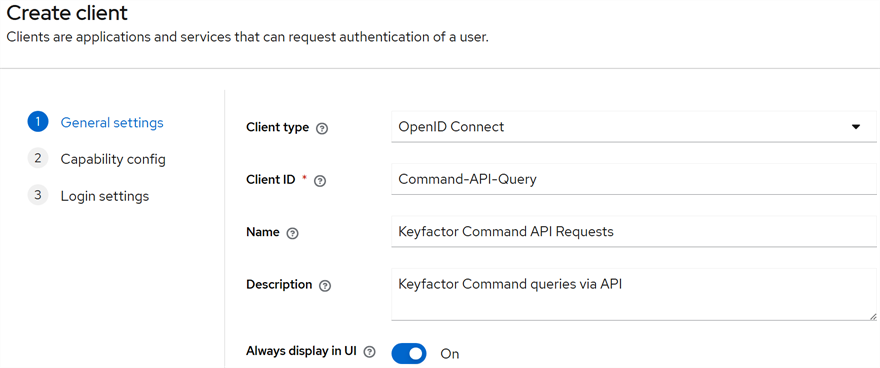
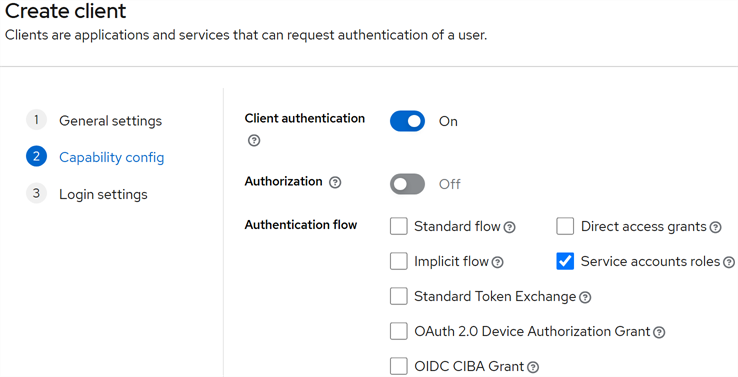
Figure 523: Add a Keycloak Service Account (Client)
-
-
In the Client details on the Credentials tab, click the Copy button next to the Client secret field to copy the unmasked version of the client secret to the clipboard (you do not need to display it unmasked first) and save this in a secure location. For the service account Keyfactor Command uses to make API requests, you will need this and the Client ID during the Keyfactor Command configuration.
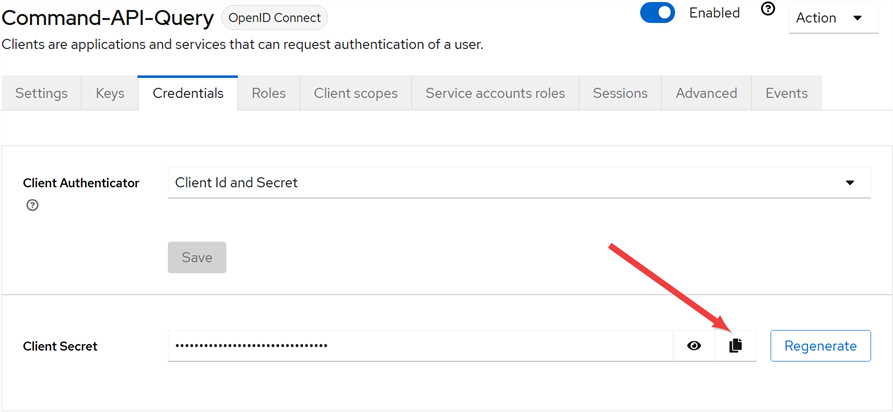
Figure 524: Copy the Keycloak Service Account (Client) Secret
Was this page helpful? Provide Feedback