
Before you can begin to use a third party PAM![]() PAM (Privileged Access Management): Controls privileged access by vaulting credentials, enforcing least-privilege/just-in-time access, rotating secrets, and auditing sessions. Across Keyfactor products, PAM protects diverse sensitive operations and secrets—for example certificate stores and CA credentials—via built-in or third-party providers; external integrations are delivered as custom PAM extensions (several published on Keyfactor’s public GitHub). provider with Keyfactor Command, you need to acquire and install the appropriate custom-built PAM extension for your desired PAM provider from the Keyfactor GitHub:
PAM (Privileged Access Management): Controls privileged access by vaulting credentials, enforcing least-privilege/just-in-time access, rotating secrets, and auditing sessions. Across Keyfactor products, PAM protects diverse sensitive operations and secrets—for example certificate stores and CA credentials—via built-in or third-party providers; external integrations are delivered as custom PAM extensions (several published on Keyfactor’s public GitHub). provider with Keyfactor Command, you need to acquire and install the appropriate custom-built PAM extension for your desired PAM provider from the Keyfactor GitHub:
To find a package on GitHub:
-
Visit the link above to find your desired package, and click either Github Repository or View source on GitHub to go to the package page on GitHub.

Figure 462: View Packages as Part of a List
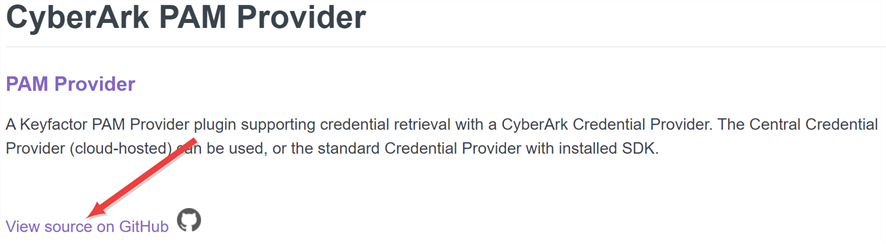
Figure 463: View Packages on Individual Pages
-
On the GitHub page, on the right-hand side, click the link for the Latest version.
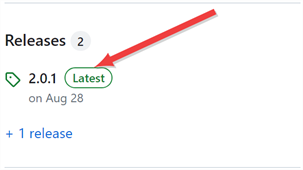
Figure 464: Find the Latest Version of the Package
-
On the GitHub version page in the Assets section, click the package name to download the zip file.
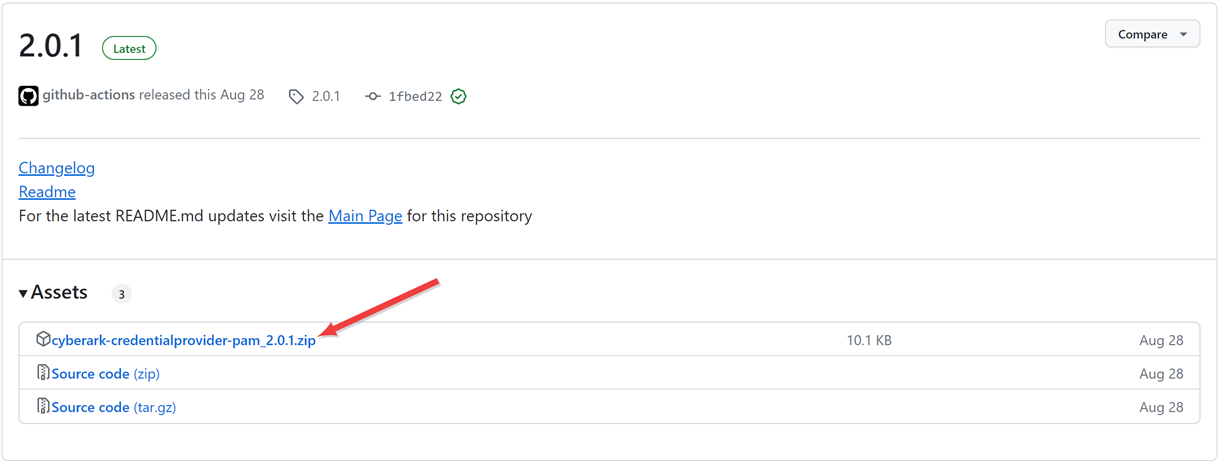
Figure 465: Download the Package Zip File
- On the main extension GitHub page, review the documentation for the specific extension. Here you will find supported platforms, prerequisites, and extension-specific installation and configuration instructions. The below instructions only cover where to place the extension files on
 A certificate authority (CA) is an entity that issues digital certificates. Within Keyfactor Command, a CA may be a Microsoft CA or a Keyfactor gateway to a cloud-based or remote CA. connector or orchestrator Keyfactor orchestrators perform a variety of functions, including managing certificate stores and SSH key stores. and building custom manifest.json files (changes to which aren’t needed for extensions from GitHub unless you are customizing something), but not the details for creation of a PAM provider type in Keyfactor Command for the extension or any other customization specific to a given extension.
Extensions support installation either locally (on the Keyfactor Command server) or remotely (on each instance of the Keyfactor CA Connector![]() The Keyfactor CA Connector is installed in the customer environment to provide a connection between a CA and Keyfactor Command when a direct connection is not possible. It is supported on both Windows and Linux and has versions for Microsoft (Windows only) or EJBCA CAs. or Keyfactor Universal Orchestrator
The Keyfactor CA Connector is installed in the customer environment to provide a connection between a CA and Keyfactor Command when a direct connection is not possible. It is supported on both Windows and Linux and has versions for Microsoft (Windows only) or EJBCA CAs. or Keyfactor Universal Orchestrator![]() The Keyfactor Universal Orchestrator, one of Keyfactor's suite of orchestrators, is used to interact with servers and devices for certificate management, run SSL discovery and management tasks, and manage synchronization of certificate authorities in remote forests. With the addition of custom extensions, it can provide certificate management capabilities on a variety of platforms and devices (e.g. Amazon Web Services (AWS) resources, Citrix\NetScaler devices, F5 devices, IIS stores, JKS keystores, PEM stores, and PKCS#12 stores) and execute tasks outside the standard list of certificate management functions. It runs on either Windows or Linux servers or Linux containers. that will be accessing PAM secrets). Be sure to follow the installation instructions for the type of installation you wish to do:
The Keyfactor Universal Orchestrator, one of Keyfactor's suite of orchestrators, is used to interact with servers and devices for certificate management, run SSL discovery and management tasks, and manage synchronization of certificate authorities in remote forests. With the addition of custom extensions, it can provide certificate management capabilities on a variety of platforms and devices (e.g. Amazon Web Services (AWS) resources, Citrix\NetScaler devices, F5 devices, IIS stores, JKS keystores, PEM stores, and PKCS#12 stores) and execute tasks outside the standard list of certificate management functions. It runs on either Windows or Linux servers or Linux containers. that will be accessing PAM secrets). Be sure to follow the installation instructions for the type of installation you wish to do:
-
Local (on the Keyfactor Command server) installations support any type of PAM secret storage supported by Keyfactor Command, including certificate stores and certificate authority
A certificate authority (CA) is an entity that issues digital certificates. Within Keyfactor Command, a CA may be a Microsoft CA or a Keyfactor gateway to a cloud-based or remote CA. secrets, but may require greater accessibility between the Keyfactor Command server and the PAM provider than is desired for your environment. -
Remote (on the CA connector or orchestrator) installations support PAM secret storage only for the objects (e.g., certificate stores managed by the Universal Orchestrator) where the PAM extension is installed, but may be a better choice in terms of network accessibility for your environment.
Local PAM Extensions on the Keyfactor Command Server
Windows Installations Under IIS
To install a PAM extension on the Keyfactor Command server:
-
Using the Keyfactor API
An API is a set of functions to allow creation of applications. Keyfactor offers the Keyfactor API, which allows third-party software to integrate with the advanced certificate enrollment and management features of Keyfactor Command., add a PAM provider type in Keyfactor Command for the custom PAM extension. See the Adding a PAM Provider Type instructions for your selected PAM extension. The following is an example request body for a POST /PamProviders/Types request to create a PAM provider type for the Delinea extension:Copy{
"Name":"Delinea-SecretServer",
"Parameters":[
{
"Name": "Host",
"DisplayName":"Secret Server URL",
"InstanceLevel":false,
"DataType": "string"
},
{
"Name":"Username",
"DisplayName":"Secret Server Username",
"InstanceLevel":false,
"DataType": "secret"
},
{
"Name":"Password",
"DisplayName":"Secret Server Password",
"InstanceLevel":false,
"DataType": "secret"
},
{
"Name":"SecretId",
"DisplayName":"Secret Server Secret ID",
"InstanceLevel":true,
"DataType": "string"
},
{
"Name":"SecretFieldName",
"DisplayName":"Secret Field Name",
"InstanceLevel":true,
"DataType": "string"
}
]
} -
On the Keyfactor Command server, locate the \WebAgentServices\Extensions\PamProviders directory within the install directory. By default, this is:
C:\Program Files\Keyfactor\Keyfactor Platform\WebAgentServices\Extensions\PamProviders - Under the Pam Providers directory, create a new directory with an appropriate name for the PAM extension (e.g., CyberArk). This name is for reference only and does not need to match any names used elsewhere.
- Place the files you downloaded for the PAM extension in the new directory.
- In the directory for the PAM extension, locate the file called manifest.json. The manifest.json file should be placed in the same directory as the DLL(s) for the extension.
-
Using a text editor, open the manifest.json file for editing and configure it appropriately for the extension, if needed. See the Configuring the Server Side manifest.json File instructions for your selected PAM extension for exact details. The following Delinea manifest.json file is provided as an example. Things to note:
-
Areas on lines 4-6, below, will vary between manifest.json files.
-
When you add your PAM provider into Keyfactor Command, the name you give it must match the name in the equivalent of your line 4 (for your manifest.json file), below (e.g., Delinea).
-
In most cases, server-side files should not need customization.
Copy{
"extensions": {
"Keyfactor.Platform.Extensions.IPAMProvider": {
"PAMProviders.Delinea.PAMProvider": {
"assemblyPath": "delinea-secretserver-pam.dll",
"TypeFullName": "Keyfactor.Extensions.Pam.Delinea.SecretServerPam"
}
}
}
} -
-
If you’ll be using PAM to store secrets for uses other than certificate stores, repeat the above steps for the PamProviders directories found here, by default:
C:\Program Files\Keyfactor\Keyfactor Platform\WebConsole\Extensions\PamProvidersC:\Program Files\Keyfactor\Keyfactor Platform\KeyfactorAPI\Extensions\PamProvidersC:\Program Files\Keyfactor\Keyfactor Platform\CAConnectorAPI\Extensions\PamProviders (for local PAM providers)C:\Program Files\Keyfactor\Keyfactor CA Connector\Extensions\PamProviders (or /opt/keyfactor-ca-connector/extensions, for Linux) (for remote PAM providers)Note: Step 1 (add a PAM provider type into Keyfactor Command) does not need to be repeated. The same PAM provider type and PAM provider may be used from multiple areas of the product. - Restart the web server services (iisreset) on the Keyfactor Command to complete the implementation.
Container Installations Under Kubernetes
To install a PAM extension:
-
Using the Keyfactor API, add a PAM provider type in Keyfactor Command for the custom PAM extension. See the Adding a PAM Provider Type instructions for your selected PAM extension. The following is an example request body for a POST /PamProviders/Types request to create a PAM provider type for the Delinea extension:
Copy{
"Name":"Delinea-SecretServer",
"Parameters":[
{
"Name": "Host",
"DisplayName":"Secret Server URL",
"InstanceLevel":false,
"DataType": "string"
},
{
"Name":"Username",
"DisplayName":"Secret Server Username",
"InstanceLevel":false,
"DataType": "secret"
},
{
"Name":"Password",
"DisplayName":"Secret Server Password",
"InstanceLevel":false,
"DataType": "secret"
},
{
"Name":"SecretId",
"DisplayName":"Secret Server Secret ID",
"InstanceLevel":true,
"DataType": "string"
},
{
"Name":"SecretFieldName",
"DisplayName":"Secret Field Name",
"InstanceLevel":true,
"DataType": "string"
}
]
} -
On your Kubernetes server, create a manifest.json file containing the customized contents of the manifest.json file for the PAM extension you are installing. The following Delinea manifest.json file is provided as an example:
Copy{
"extensions": {
"Keyfactor.Platform.Extensions.IPAMProvider": {
"PAMProviders.Delinea.PAMProvider": {
"assemblyPath": "delinea-secretserver-pam.dll",
"TypeFullName": "Keyfactor.Extensions.Pam.Delinea.SecretServerPam"
}
}
}
} -
Create a PersistentVolume in Kubernetes to contain your manifest.json file, the dll it references, and any supporting files. The steps for this will vary depending on your Kubernetes implementation and the intended storage location used by your PersistentVolume.
Tip: You can create a PersistentVolume in the local file system for testing purposes as follows:Create a directory that your PersistentVolume will reference and which will contain the files to be mounted via the persistent volume. For example:
mkdir /opt/files/Create a YAML file to define the PersistentVolume similar to the following:
apiVersion: v1 kind: PersistentVolume metadata: name:
Create the PersistentVolume based on the yaml file you created. For example:
sudo kubectl apply --filename=/opt/files/PersistentVolumes are cluster-scoped resources, meaning they are not associated with a specific namespace.
Create a YAML file to define a PersistentVolumeClaim associated with the PersistentVolume similar to the following:
apiVersion: v1 kind: PersistentVolumeClaim metadata: name:
Create the PersistentVolumeClaim based on the yaml file you created. For example:
sudo kubectl apply --filename=/opt/files/Unlike PersistentVolumes, PersistentVolumeClaims are associated with a specific namespace.
Place the files that should be mounted in the container into the directory you specified in the file system. For example:
/opt/files/workflow/manifest.json/opt/files/workflow/delinea-secretserver-pam.deps.json/opt/files/workflow/delinea-secretserver-pam.dll
Important: This method should not be used for a production PersistentVolume. -
Edit your values file to add a volume and volumeMount for the PersistentVolume containing the manifest.json file, dll, and any supporting files. For example, the following values file section shows the example root trusts volume (see Install Keyfactor Command in Containers Under Kubernetes) and the pam-custom-volume. Your PersistentVolume claim name should match the claimName referenced here.
workloadDefaults: volumes: - name: root-cas configMap: name: ca-roots items: - key: ca-certificates.crt path: ca-certificates.crt - name: pam-custom-volume persistentVolumeClaim: claimName: pam-pvc volumeMounts: - name: root-cas mountPath: /etc/ssl/certs/ca-certificates.crt subPath: ca-certificates.crt - name: pam-custom-volume mountPath: /app/Extensions/my-custom-pam -
Load the new values, referencing the deployment name, namespace, your customized values file, the helm chart, and version. For example:
sudo helm upgrade Helm_Deployment_Name --namespace keyfactor-command --values values-local.yaml oci://repo.keyfactor.com/charts/command --version 25.5
Remote PAM Extensions on the Keyfactor Universal Orchestrator Server (Windows or Linux)
To install a PAM extension on a Universal Orchestrator for use by that orchestrator only for a Windows or Linux install:
-
Using the Keyfactor API, add a PAM provider type in Keyfactor Command for the custom PAM extension. See the Adding a PAM Provider Type instructions for your selected PAM extension. The following is an example request body for a POST /PamProviders/Types request to create a PAM provider type for the Delinea extension:
Copy{
"Name":"Delinea-SecretServer",
"Parameters":[
{
"Name": "Host",
"DisplayName":"Secret Server URL",
"InstanceLevel":false,
"DataType": "string"
},
{
"Name":"Username",
"DisplayName":"Secret Server Username",
"InstanceLevel":false,
"DataType": "secret"
},
{
"Name":"Password",
"DisplayName":"Secret Server Password",
"InstanceLevel":false,
"DataType": "secret"
},
{
"Name":"SecretId",
"DisplayName":"Secret Server Secret ID",
"InstanceLevel":true,
"DataType": "string"
},
{
"Name":"SecretFieldName",
"DisplayName":"Secret Field Name",
"InstanceLevel":true,
"DataType": "string"
}
]
} -
On the Universal Orchestrator server, locate the extensions directory within the install directory. By default, this is:
Windows: C:\Program Files\Keyfactor\Keyfactor Orchestrator\extensionsLinux: /opt/keyfactor/orchestrator/extensions - Under the extensions directory, create a new directory with an appropriate name for the PAM extension (e.g., CyberArk). This name is for reference only and does not need to match any names used elsewhere.
- Place the files you downloaded for the PAM extension in the new directory.
- In the directory for the PAM extension, locate the file called manifest.json. The manifest.json file should be placed in the same directory as the DLL(s) for the extension.
-
Using a text editor, edit the manifest.json file and configure it appropriately for the extension. See the Configuring the Client Side manifest.json File instructions for your selected PAM extension for exact details. The following Delinea manifest.json file is provided as an example. Things to note:
-
Areas in lines 4-6 and 10-14, below, will vary between manifest.json files.
-
Areas shown in red text are examples of items that need to be customized for your environment.
-
When you add your PAM provider into Keyfactor Command, the name you give it must match the name in the equivalent of your line 4 (for your manifest.json file), below (e.g., Delinea-SecretServer).
Copy{
"extensions": {
"Keyfactor.Platform.Extensions.IPAMProvider": {
"PAMProviders.Delinea-SecretServer.PAMProvider": {
"assemblyPath": "delinea-secretserver-pam.dll",
"TypeFullName": "Keyfactor.Extensions.Pam.Delinea.SecretServerPam"
}
}
},
"Keyfactor:PAMProviders:Delinea-SecretServer:InitializationInfo": {
"Host": "http://127.0.0.1:8200",
"Path": "v1/secret/data",
"Token": "xxxxxx"
}
} -
- Restart the Universal Orchestrator service (see Start the Universal Orchestrator Service).
Remote PAM Extensions on the Keyfactor Universal Orchestrator Server (Container)
To install a PAM extension on a Universal Orchestrator for use by that orchestrator only for a container install:
- Docker: Follow the instructions as per Custom Extensions with Docker referencing the PAM extension of your choosing.
-
Kubernetes without Helm: Follow the instructions as per Kubernetes Custom Extensions without Helm referencing the PAM extension of your choosing with the following addition:
-
In addition to the ConfigMap created for the extension-downloader, create a custom manifest.json file with an accompanying a ConfigMap:
kubectl create configmap custom-manifest-configmap --namespace keyfactor-orchestrators --from-file=manifest.json=/opt/kyf_orch1/manifest.json -
Reference this ConfigMap in your Kubernetes deployment file. For example, for Delinea (this shows only a portion of the file):
# Initial portion of file not shown
spec:
      initContainers:
        # The below block provides an example of adding a custom extension
        - command:
          - /bin/sh
          - -c
          - python /tmp/install.py --extension delinea-secretserver-pam --version 1.0.1
            --out /app/extensions/delinea-secretserver-pam
          image: python:3.11.10
          imagePullPolicy: IfNotPresent
          name: extensiondownloader
          resources: {}
          terminationMessagePath: /dev/termination-log
          terminationMessagePolicy: File
          volumeMounts:
          - mountPath: /tmp
            name: extensiondownloader
          - mountPath: /app/extensions/delinea-secretserver-pam
            name: plugin
      containers:
        # Initial content of containers section not shown

        volumeMounts:
          - mountPath: /etc/ssl/certs/ca-certificates.crt
            name: root-ca
            readOnly: true
            subPath: ca-certificates.crt
          - mountPath: /app/extensions/delinea-secretserver-pam
            name: plugin
            readOnly: false
          - mountPath: /app/extensions/delinea-secretserver-pam/manifest.json
            name: custom-manifest
            readOnly: false
            subPath: manifest.json

      volumes:
        - configMap:
            items:
            - key: ca-certificates.crt
              path: ca-certificates.crt
            name: ca-roots
          name: root-ca
        - configMap:
            defaultMode: 420
            name: extension-downloader-configmap
          name: extensiondownloader
        - emptyDir: {}
          name: plugin
        - configMap:
            items:
              - key: manifest.json
                path: manifest.json
            name: custom-manifest-configmap
          name: custom-manifest

        # Remainder of file not shown
-
-
Kubernetes with Helm: Follow the instructions as per Kubernetes Custom Extensions with Helm referencing the PAM extension of your choosing.
-
In addition to the ConfigMap created for the extension-downloader, create a custom manifest.json file with an accompanying a ConfigMap:
kubectl create configmap custom-manifest-configmap --namespace keyfactor-orchestrators --from-file=manifest.json=/opt/kyf_orch1/manifest.json -
Reference this ConfigMap in your Kubernetes deployment file. For example, for Delinea (this shows only a portion of the file):
# Initial portion of file not shown
workloadDefaults:
  volumeMounts:
    - mountPath: /app/extensions/delinea-secretserver-pam
      name: plugin
    - mountPath: /app/extensions/delinea-secretserver-pam/manifest.json
      name: custom-manifest
      readOnly: false
      subPath: manifest.json
    - mountPath: /etc/ssl/certs/ca-certificates.crt
      name: root-ca
      readOnly: true
      subPath: ca-certificates.crt

  volumes:
    - configMap:
        defaultMode: 420
        name: extension-downloader-configmap
      name: extensiondownloader
    - emptyDir: {}
      name: plugin
    - configMap:
        items:
          - key: manifest.json
            path: manifest.json
        name: custom-manifest-configmap
      name: custom-manifest
    - configMap:
        name: ca-roots
        items:
        - key: ca-certificates.crt
          path: ca-certificates.crt
      name: root-ca

initContainers:
  - command:
    - /bin/sh
    - -c
    - python /tmp/install.py --extension delinea-secretserver-pam --version 1.0.1
      --out /app/extensions/delinea-secretserver-pam
    image: python:3.11.10
    imagePullPolicy: IfNotPresent
    name: extensiondownloader
    resources: {}
    terminationMessagePath: /dev/termination-log
    terminationMessagePolicy: File
    volumeMounts:
    - mountPath: /tmp
      name: extensiondownloader
    - mountPath: /app/extensions/delinea-secretserver-pam
      name: plugin

# Remainder of file not shown
-
Be sure to use the remote version of the manifest.json file and give the PAM provider a unique name for the orchestrator. The provider name is Delinea-SecretServer-Orch1 in the following example. Use this same name when creating a PAM provider in Keyfactor Command for use with this orchestrator.
{
  "extensions": {
    "Keyfactor.Platform.Extensions.IPAMProvider": {
      "Delinea-SecretServer-Orch1": {
        "assemblyPath": "delinea-secretserver-pam.dll",
        "TypeFullName": "Keyfactor.Extensions.Pam.Delinea.SecretServerPam"
      }
    }
  },
 "Keyfactor:PAMProviders:Delinea-SecretServer-Orch1:InitializationInfo": {
    "Host": "https://YOUR-DELINEA-URL/SecretServer",
    "Username": "YOUR-DELINEA-USERNAME",
    "Password": "YOUR-DELINEA-PASSWORD"
 }
}
Remote PAM Extensions on the CA Connector Client (Windows or Linux)
To install a PAM extension on a CA Connector Client for use by that connector only for a Windows or Linux install:
-
Follow the instructions as per Remote PAM Extensions on the Keyfactor Universal Orchestrator Server (Windows or Linux).
-
On the CA Connector Client server, the extensions directory within the install directory is by default:
Windows: C:\Program Files\Keyfactor\Keyfactor CA Connector\extensionsLinux: /opt/keyfactor/ca-connector/extensions - Restart the CA Connector Client service (see Start the Service).
Remote PAM Extensions on the CA Connector Client (Container)
To install a PAM extension on a CA Connector Client for use by that connector only for a container install, follow the instructions as per Remote PAM Extensions on the Keyfactor Universal Orchestrator Server (Container).
Was this page helpful? Provide Feedback