Roles
Roles define the permissions a user has in the Analytics Hub portal. Users can be assigned one or more roles; effective access is the union of assigned permissions.
Admin Area → Access Control → Roles
Use the checkboxes to run actions on one or more roles. Supported actions on this page are:
-
New Role: Create a role, name and describe it, and select permissions (see Create a Role).
-
Delete: Remove selected role(s).
Important: Use caution. Users assigned to a deleted role lose those permissions. If that role is their only role, they lose access to the system. -
Edit: Change a role’s name, description, or permissions.
Actions may appear as toolbar buttons, links in grid rows, or inside the More actions (![]() ) menu. If you don’t see an action as a button or in the grid, open More actions (
) menu. If you don’t see an action as a button or in the grid, open More actions (![]() ) and look for it there. Availability of actions depends on your selection, item status, and permissions.
) and look for it there. Availability of actions depends on your selection, item status, and permissions.
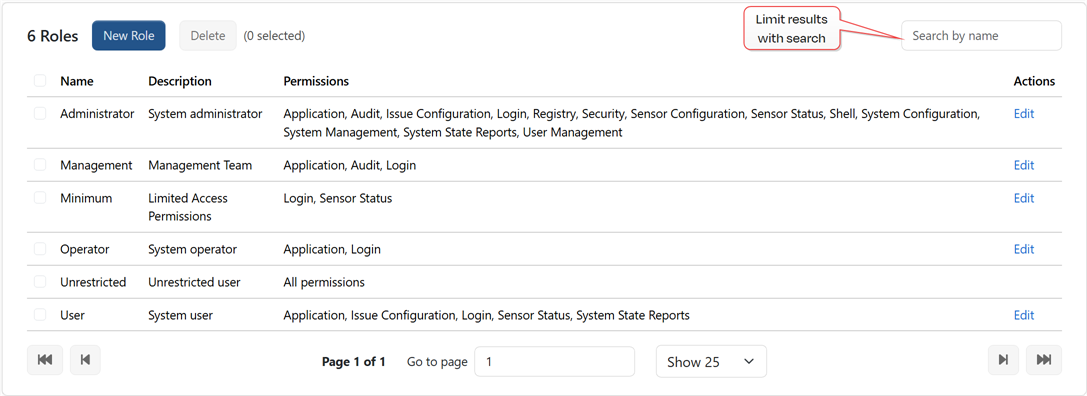
Figure 63: Roles
Filter the grid using the search, then choose how many items to display in the Rows per page dropdown (e.g., 10, 25, 50). Use the Next/Previous controls to view additional records. Most fields are sortable.
The built-in roles are Administrator, Operator, Unrestricted, and User.
Table 4: Permissions
| Permission | Grants Access to Analytics Hub Portal Areas |
|---|---|
| Application |
|
| Audit |
|
| Issue Configuration |
|
| Login |
This permission is required to login to the Analytics Hub portal. |
| Registry | Configuration modification via the command line interface (CLI). |
| Security |
|
| Sensor Configuration |
This permission must be granted in conjunction with Sensor Status. |
| Sensor Status |
|
| Shell |
|
| System Configuration |
|
| System Management |
|
| System State Reports |
|
| User Management |
|
Create a Role
To add a new role:
-
Browse to Admin Area → Access Control → Roles and click New Role.
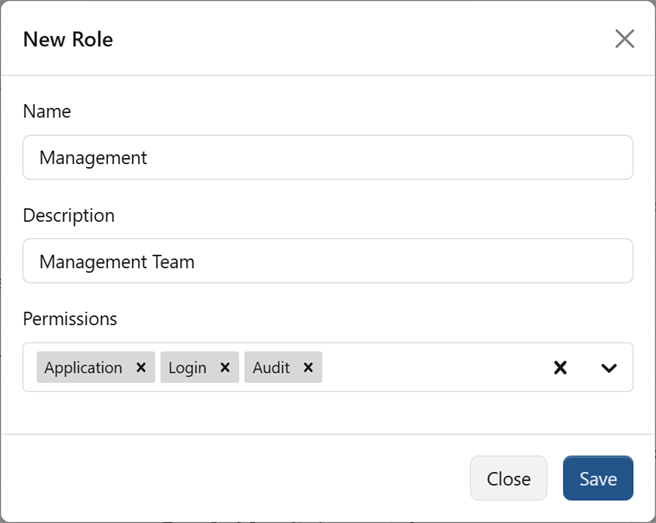
Figure 64: Add a Role
- In the New Role dialog, enter a Name for the role.
- Optionally, enter a Description for the role.
- Use the Permissions dropdown to add permissions. Selected permissions appear as tags (e.g., Application X, Issue Configuration X). Click X to remove a tag.
- Click Save to create the record.
Was this page helpful? Provide Feedback