Configure Renewal Handler Permission
The expiration renewal event handler allows you to execute a certificate renewal automatically for each expiring certificate that is found in a supported certificate store for each expiration alert when the alert task is triggered by the execution of the expiration alerts. In order for the renewal handler to execute successfully, the Active Directory service account under which the Keyfactor Command Service runs must have select permissions in the Keyfactor Command Management Portal. In addition, if you wish to test the execution of expiration alerts with renewal handlers and your IIS application pool runs in the context of a different Active Directory service account than the Keyfactor Command Service, the Active Directory service account for the IIS application pool must also be granted these permissions.
If you're using an EJBCA CA, no further permissions need to be granted and this step may be skipped.
If you don’t plan to use the expiration renewal handler, you can skip this step.
To configure permissions for the service account(s) to support use of the expiration renewal handler:
- In the Keyfactor Command Management Portal, browse to System Settings Icon
 > Security Roles & Identities.
 - On the Security Roles and Identities page on the Security Roles tab, click Add to create a new role to be used just to grant permissions to the service account(s) to support use of the expiration renewal handler.
- On the Details tab, give it an appropriate name and description to reflect this usage.
- On the Global Permissions tab, click the Enroll PFX toggle for Certificate Enrollment to enable it, click the Read and Schedule toggles for Certificate Store Management to enable them, and click the Read toggle for Management Portal to disable it, if enabled.
- Click Save to save the role.
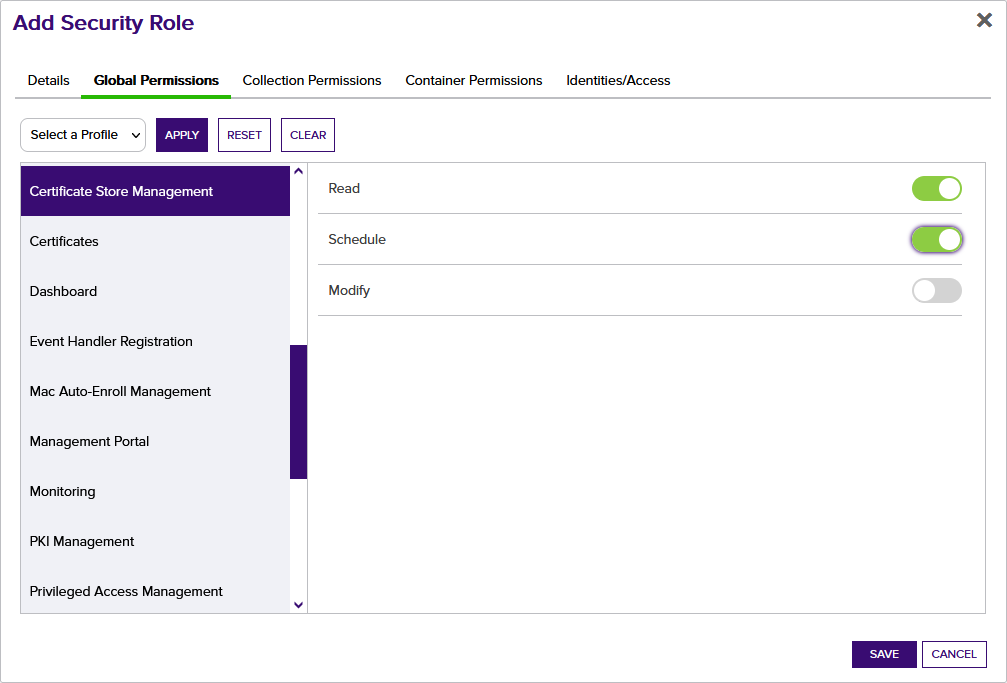
Figure 524: Configure Expiration Renewal Handler
- On the Security Roles and Identities page on the Security Identities tab, click Add to add a new security identity.
- In the Security Identities dialog, enter the Active Directory user name of the service account under which the Keyfactor Command Service runs using DOMAIN\username format and click Save. If the account resolves correctly, the new identity will be saved and the dialog will close.
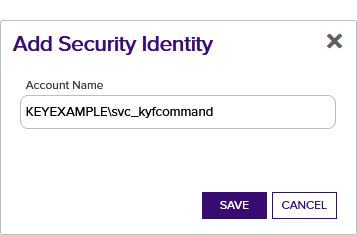
Figure 525: Configure Expiration Renewal Handler: Add New Identity
- If your IIS application pool runs as a different Active Directory service account from that used for the Keyfactor Command Service, repeat steps four and five for the IIS application pool service account.
- In the Security Identity Editor section of the page, double-click the Keyfactor Command Service identity in the identity grid, right-click the row in the identity grid and choose Edit Roles from the right-click menu, or highlight the Keyfactor Command Service identity in the identity grid and click Edit Roles at the top of the identity grid.
- In the Roles dialog, select the role you created for the expiration renewal handler in the Available Roles list and use the right arrow to move the role to the Current Roles list. Click Save to assign the role to the identity.
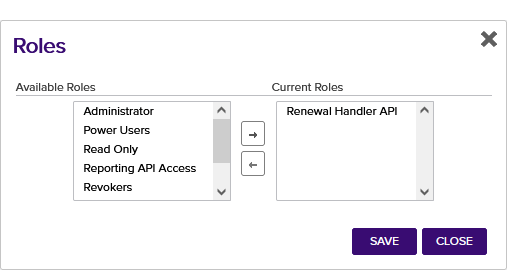
Figure 526: Configure Expiration Renewal Handler: Assign Role to Identity
- If your IIS application pool runs as a different Active Directory service account from that used for the Keyfactor Command Service, repeat steps seven and eight for the IIS application pool service account.
