Key Rotation alert operations include creating, editing or deleting a key rotation alert, configuring an alert schedule, copying alerts to create similar alerts for different recipients or collections, and testing alerts.
When the alerts are run using workflow, there are two Keyfactor Command service jobs that perform this function. The first, running as scheduled for the alerts (see Configuring a Key Rotation Alert Schedule), gathers any SSH![]() The SSH (secure shell) protocol provides for secure connections between computers. It provides several options for authentication, including public key, and protects the communications with strong encryption. keys that are approaching their stale date and that meet the alert criteria. The second, running every 10 minutes, takes the collected SSH keys and generates workflow instances for each.
The SSH (secure shell) protocol provides for secure connections between computers. It provides several options for authentication, including public key, and protects the communications with strong encryption. keys that are approaching their stale date and that meet the alert criteria. The second, running every 10 minutes, takes the collected SSH keys and generates workflow instances for each.
 Adding or Modifying a Key Rotation Alert
- In the Management Portal, browse to Alerts > Key Rotation.
- On the Key Rotation Alerts page, click Add from the top menu to create a new alert, or Edit, from either the top or right click menu, to modify an existing one.
-
In the Key Rotation Alert Settings dialog, select a Timeframe for the alert by choosing the number of days, weeks, or months to define the alert period.
Note: When the alert is stored in the database, weeks are converted to 7 days and months are converted to 30 days. - In the Key Rotation Alert Settings dialog, enter a Display Name for the alert. This name appears in the list of key rotation alerts in the Management Portal.
-
To use workflow to deliver the alerts, leave the Use Workflows toggle enabled. To use the legacy alerting system to deliver the alerts, toggle the Use Workflows to disabled.
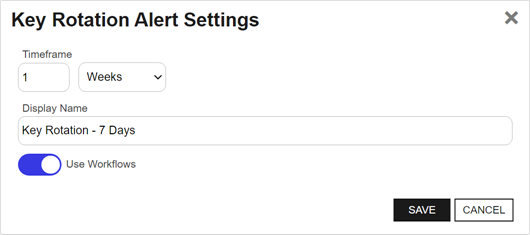
Figure 155: Create a Key Rotation Alert with Use Workflows Enabled
-
If you toggled the Use Workflows option to disabled, you will see the Subject field. Enter a subject line for the email message that will be delivered when the alert is triggered. You can use substitutable special text in the subject line. Substitutable special text uses a variable in the alert definition that is replaced by data from the key record at processing time. For example, you can enter {fingerprint} in the alert definition and each alert generated at processing time will contain the specific fingerprint of the given key instead of the variable {fingerprint}. To add substitutable special text to the subject line, type the special text variable enclosed in curly braces (e.g. {fingerprint}).
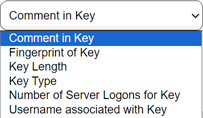
Figure 156: Substitutable Special Text for Key Rotation Alerts
-
If you toggled the Use Workflows option to disabled, you will see the Message box. Enter the body of the email message that will be delivered when the alert is triggered. You can use the Insert special text dropdown below the message window to add substitutable special text to the message. Place your cursor where you would like the text to appear, select the appropriate variable from the dropdown, and click Insert. Alternately, you can type the special text variable enclosed in curly braces directly. If desired, you can format the message body using HTML. For example, you could place the key detail information into a table by replacing this text:
Fingerprint: {fingerprint}Username: {username}Comment: {comment}With this HTML code:
<table><tr><td>Fingerprint:</td><td>{fingerprint}</td></tr><tr><td>Username:</td><td>{username}</td></tr><tr><td>Comment:</td><td>{comment}</td></tr></table>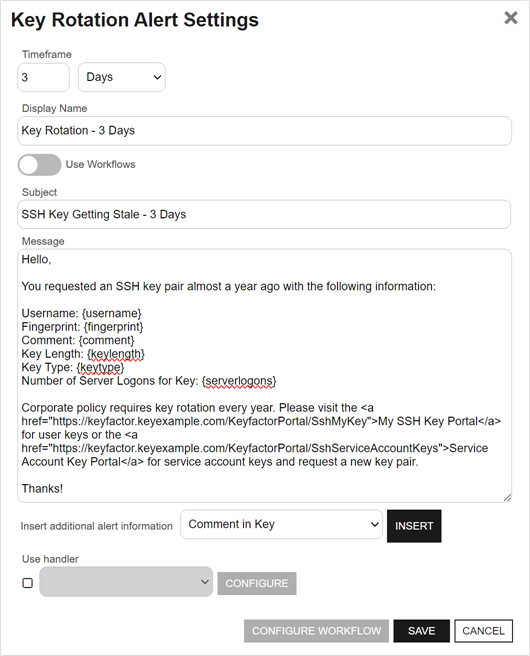
Figure 157: Create a Key Rotation Alert with Use Workflows Disabled
-
If you toggled the Use Workflows option to disabled, you will see the Use handler box. If you would like the alert to trigger an event handler at processing time, select the appropriate handler in the dropdown, and click the Configure button to configure the event handler. See Adding Logging Handlers to Alerts for information on using event logging handlers.
Tip: With workflows, the equivalent functionality to the handlers can be achieved using either Set Variable Data or Use Custom PowerShell steps. See the examples for Write to Windows Event Log with Expiration Workflow and Update Additional Enrollment Field on Enrollment. -
Click Save to save your key rotation alert.
If you enabled the Use Workflow option and are saving an alert that does not have a matching workflow, you will receive a notification indicating that a workflow needs to be created to match the alert. When you click OK to the notification, you will be redirected to the workflow page with a new workflow open and pre-populated with the Name, Type, and Key Rotation Alert (key) appropriate to the alert you have saved.
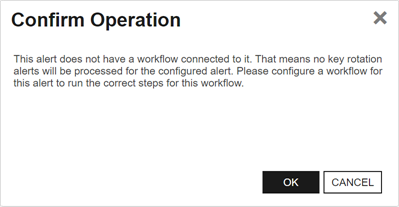
Figure 158: Workflow Required for Alert Notice
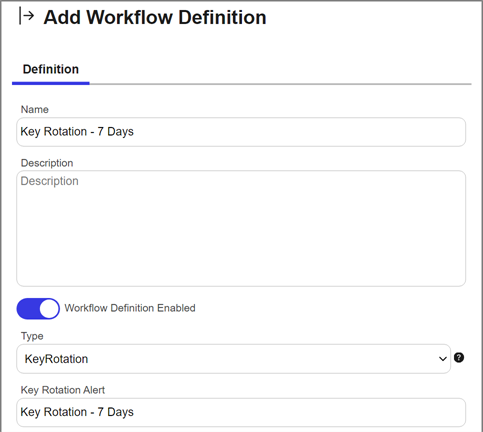
Figure 159: Workflow Pre-Populated for Key Rotation Alert
- In the Add/Edit Workflow Definition dialog on the Definition tab, enter a Description for your workflow.
- On the Workflow Configuration page, add a new step of type Send Email (see Adding, Copying or Modifying a Workflow Definition) with appropriate subject, message, and recipients for your key rotation alert.
- If desired, add other steps to the workflow for other functionality such as event logging (see the example Write to Windows Event Log with Expiration Workflow).
 Configuring a Workflow for a Key Rotation Alert
For key rotation alerts that use workflow, you can open the associated workflow for the alert using the Configure Workflow option.
- In the Management Portal, browse to Alerts > Key Rotation.
- On the Key Rotation Alerts page, highlight a row in the alerts grid and click Configure Workflow from the grid header or right-click menu.
- You will be redirected to the workflow workspace for the workflow associated with the selected alert. If a workflow does not exist for the selected alert, one will be created and pre-populated with the Name, Type, and Key Rotation Alert (key) of the selected alert. Edit the workflow as needed (see Adding, Copying or Modifying a Workflow Definition).
 Copying an Existing Key Rotation Alert
You may use the copy operation to create multiple similar alerts—for example, one for a warning a month in advance of the stale date of keys and another shortly before the keys become stale.
- In the Management Portal, browse to Alerts > Key Rotation.
- On the Key Rotation Alerts page, highlight a row in the alerts grid and click Copy from the grid header or right-click menu.
- The Key Rotation Alert Settings dialog will pop-up with the details from the selected alert. The display name field will have - Copy tagged to the end of it to indicate it is a new alert. You may modify the alert as needed and click Save to add the new alert, or Cancel to cancel the operation.
 Deleting a Key Rotation Alert
- In the Management Portal, browse to Alerts > Key Rotation.
- On the Key Rotation Alerts page, highlight a row in the alerts grid and click Delete from the grid header or right-click menu.
- On the Confirm Operation alert, click OK to confirm or Cancel to cancel the operation.
 Configuring a Key Rotation Alert Schedule
After adding your desired key rotation alerts, you may configure a schedule to send the alerts.
- In the Management Portal, browse to Alerts > Key Rotation.
- On the Key Rotation Alerts page, click the Configure button at the top of the Key Rotation Alerts page to configure an alert execution schedule. This defines the frequency with which key rotation alerts are sent. This type of alert is scheduled for daily delivery at a specified time.

Figure 160: Key Rotation Alert Schedule
 Testing Key Rotation Alerts
Once the alerts are configured, you may run a test of all or selected alerts to see if they are configured correctly.
- In the Management Portal, browse to Alerts > Key Rotation.
- On the Key Rotation Alerts page, highlight a row in the alerts grid and click Test from the grid header or right-click menu.
- In the Key Rotation Alert Test dialog, select a Start Date and End Date for the test period. This would be the period when the SSH keys are reaching the defined stale period.
-
In the Key Rotation Alert Test: Select Targets dialog, select one or more users for testing. For alerts that do not use workflow, enable the Send Emails option if you would like to deliver email messages as part of the test. Alerts that do use workflow will generate workflow instances for each selected user.
Tip: If no users appear in the grid for testing, this indicates no users with SSH keys were found matching the criteria of the alert and test period selected for testing. - Click the Start Tests button to begin generating alerts. Depending on the number of users to process, this may take a few seconds.
-
In the Key Rotation Alert Test: Results dialog, you can review the generated key rotation alerts to confirm that the substitutable special text is being replaced as expected and the recipients are as expected. Scroll the First, Previous, Next and Last buttons at the bottom of the dialog. The number of alerts generated will display between the navigation buttons.
Note: The display results will vary depending on whether the alert uses workflow to deliver the alerts or the legacy alerting system.
If you're using an event handler with the legacy alert system, the event handler is run and the handler actions taken (PowerShell script run, event log message written) when the test is run. This is true whether or not you click the Send Emails toggle.
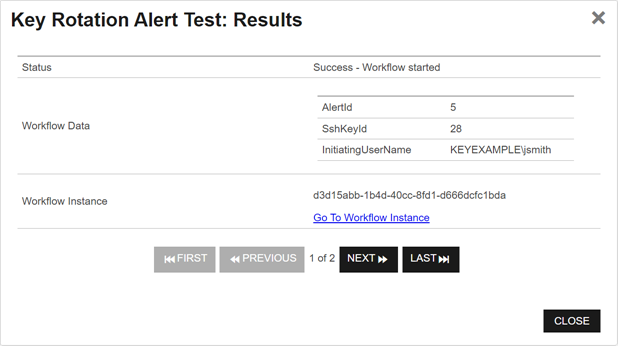
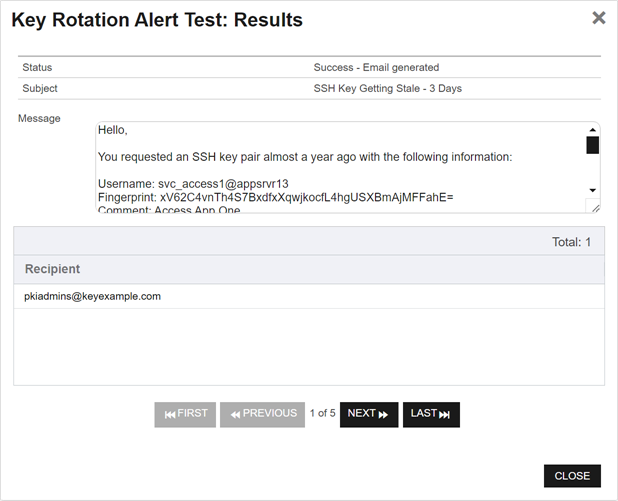
Figure 161: Key Rotation Alert Test Results With and Without Workflow
Refer to the following table for a complete list of the substitutable special text that can be used to customize alert messages.
Table 12: Substitutable Special Text for Key Rotation Alerts using the Legacy Alerting System
|
Variable |
Name |
Description |
|---|---|---|
|
{comment} |
Comment in Key |
The user-defined descriptive comment, if any, on the key. Although entry of an email address in the comment field of an SSH key is traditional, this is not a required format. The comment may can contain any characters supported for string fields, including spaces and most punctuation marks. |
|
{fingerprint} |
Fingerprint of Key |
The fingerprint of the public key. Each SSH public key has a single cryptographic fingerprint that can be used to uniquely identify the key. |
|
{keylength} |
Key Length |
The key length for the key. The key length depends on the key type selected. Keyfactor Command supports 256 bits for Ed25519 and ECDSA and 2048 or 4096 bits for RSA. |
|
{keytype} |
Key Type |
A number of cryptographic algorithms can be used to generate SSH keys. Keyfactor Command supports RSA, Ed25519, and ECDSA. RSA keys are more universally supported, and this is the default key type when generating a new key. |
|
{serverlogons} |
Number of Server Logons for Key |
The number of Linux logons associated with the key, if any, granting the holder of the private key pair logon access on the server where the Linux logon resides. |
|
{username} |
Username associated with Key |
The username of the user or service account associated with the key. For a user, the username is in the form of an Active Directory account (e.g. DOMAIN\username). For a service account, the username is made up of the username and client hostname entered when the service account key was created (e.g. myapp@appsrvr75). |
Was this page helpful? Provide Feedback